Showing posts with label TipsTricks. Show all posts

Tuesday, February 9, 2016

How To Change Folder Color In Windows - Folder Color Changer

- 2 comments
change-folder-color-in-windows-2016-folder-color-changer
Folder Color Changer Windows

How To Change Folder Color In Windows - Folder Color Changer

Namaste! Microsoft Windows is most widely used operating system with many features and tools. But there is one issue which many users facing that you can't change the color of any folder. It makes it less attractive because we all have many different folders in our computer with same yellow color. As you are a computer user you have plenty of folders where you keep your important files such as music, pictures, videos, documents and endless list of other stuffs. So sometimes it's tough to find the particular folder at the moment because of plenty of folders with same yellow color. How to change color of any folder in windows operating system latest guide 2016.

So in this tutorial I'm going to explain how you can change the color of any folder in windows within few clicks. There are many software which claims to change the folder color but most of them are fake and malicious, some have worst user interface. Latest Folder Color Changer 2016.  But here I'll provide you the best and easy to use folder color changer for windows. It's a very useful windows tool named as 'Folder Colorizer'. In this tutorial I'll explain two different ways to change the folder color or icon in Windows with and without software. Change the color of folder with single click.

A. Change Folder icons by standard Windows way without any software:

  • Select the desired folder and right click on it.
  • Now select Properties from the drop-down menu. 
  • Then go to Customize tab in properties. 
  • And click on Change icon button there. 
  • Here select the icon from the suggested list. 
  • Then change the icon by clicking on OK and then Apply button.

Above mentioned steps are to change folder icon without any software but it's not that useful because you don't have full freedom of different colors. So there is a small utility which can do this in just a single click and with lots of different color choices.

B. Follow the below steps to change folder color in windows with Folder Colorizer:

Step 1. First of all download 'Folder Colorizer' from given link. 

Step 2. After complete downloading run the setup and follow the installation instruction. 

Step 3. Now as you have successfully installed Folder Colorizer Windows utility go to the location of the folder which you want change the color. 

Step 4. Right click on the folder and choose the color you want and click on it. That's it you have changed the color of that folder

windows-folder-color-changer-2016-change-folder-color

Features of Folder Color Changer for Windows:

  • Easy to use 
  • Small utility
  • Lots of colors 
  • One click folder color change
  • Not harmful for your computer 
  • Risk free
  • Custom colors
  • Enough! :D
Only one click and folder color is changed. Isn't it cool ? So use this awesome Windows Folder Color changer and enjoy the colorful folders. Latest Windows Folder Color Changer 2016. So enjoy changing the color of folder in windows. I hope you all have enjoyed this tutorial. Change Folder Color Windows 2016. If you have any issue regarding Folder Color Changing, ask in comments. :)

Monday, March 30, 2015

Fileice Survey Bypass/Complete In A Minute Latest [Working] 2015

- No comments
fileice_survey_bypass_complete_in_a_minute
Fileice Survey Bypass
Namaste :) In this post we are back with a awesome tutorial 'How to complete/bypass Fileice Survey'. Yes! Now you can complete of bypass fileice survey by your own, you don't need any software or bypass tool. As we all know that all the tools and software those offers to get direct link of Fileice files are fake and not working. So today I'll guide you to complete fileice survey to get your desired file instantly. 

There are lot of website which are posting Fileice survey completion guide. But most of them are fake and doesn't providing real and working method to bypass fileice surveys. Don't worry in this post I'll teach you step-by-step 'How you can complete Fileice Survey in a minute'. 

By this trick you can bypass any survey. This method is also works on Cleanfiles, Sharecash etc. So read full post and be prepared to bypass any kind of Survey by itself. After reading this post you won't need to ask or beg anyone to bypass your survey link.

How To Bypass Filiece, Sharecash and Cleanfiles Survey - 


Step 1. First of all you must have a VPN or Good Proxy of US.

Step 2. Now connect VPN with US server and check your ip location from Here!

Step 3. Then open Fileice Link in Internet Explorer or Google Chrome. 

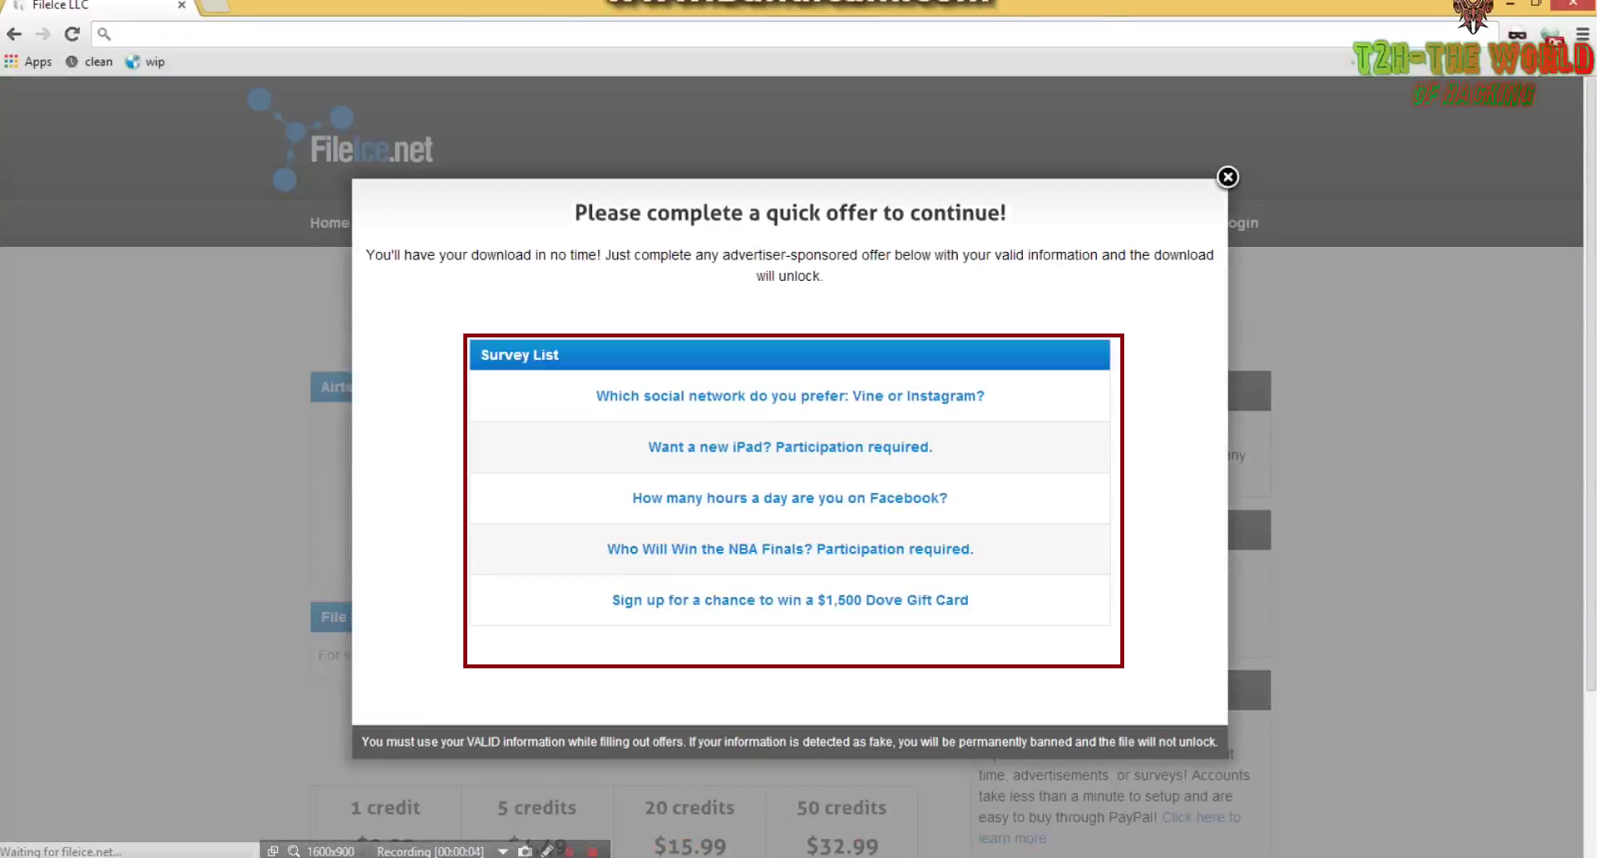
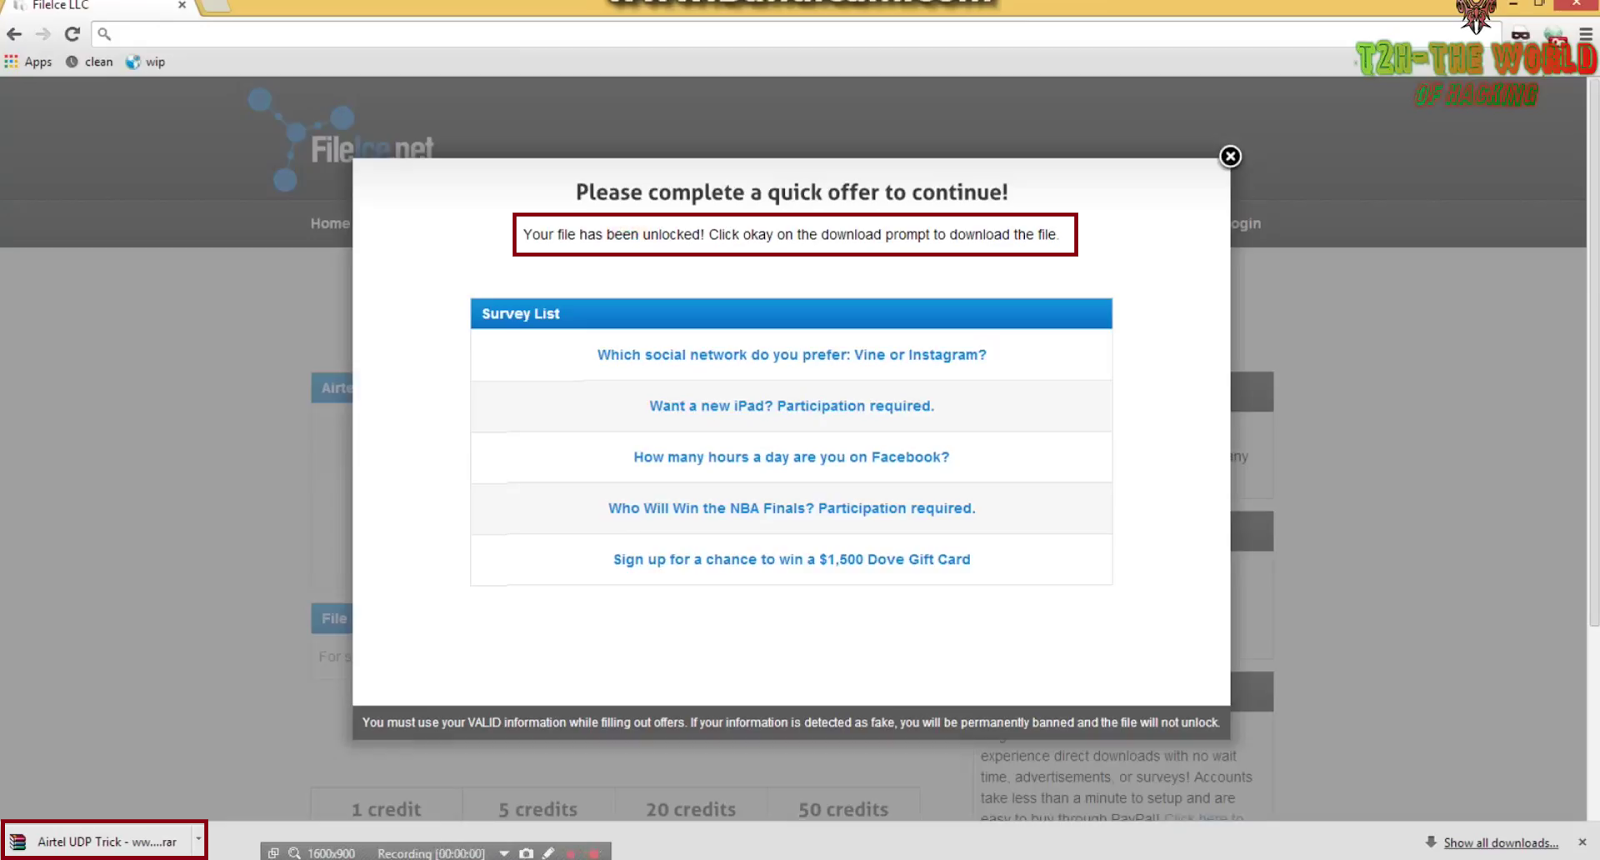
Step 4. Now click on 'Regular Download' and select any survey, a new tab will open. 
how_to_complete_fileice_survey

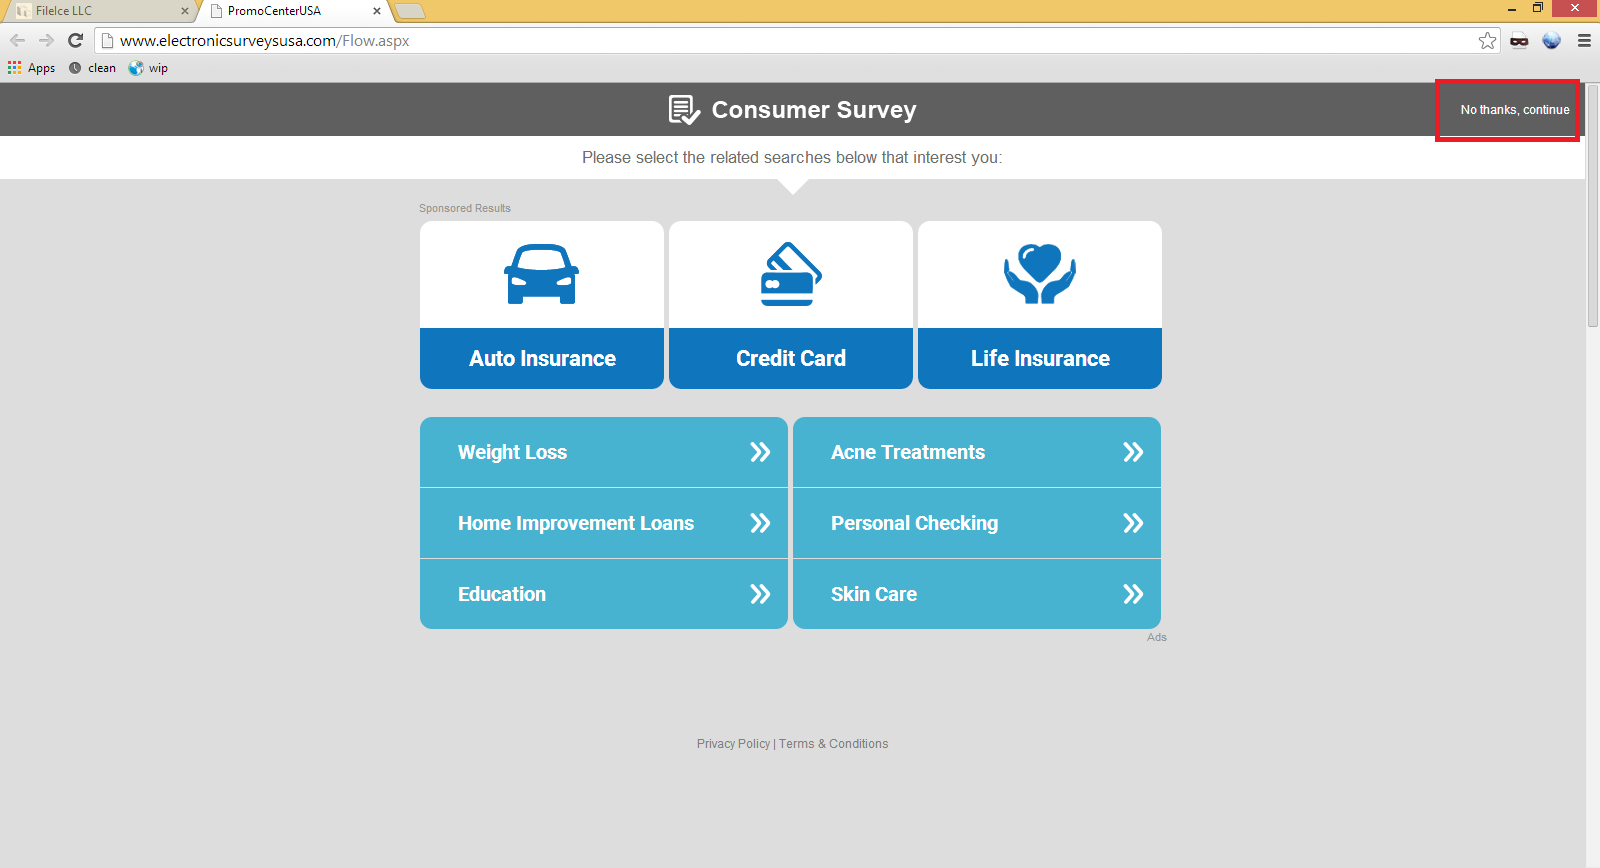
Step 5. Now Click on 'No thanks continue' in top right corner and then answer some useless questions. :P
fileice_survey_bypass_trick_latest_2015

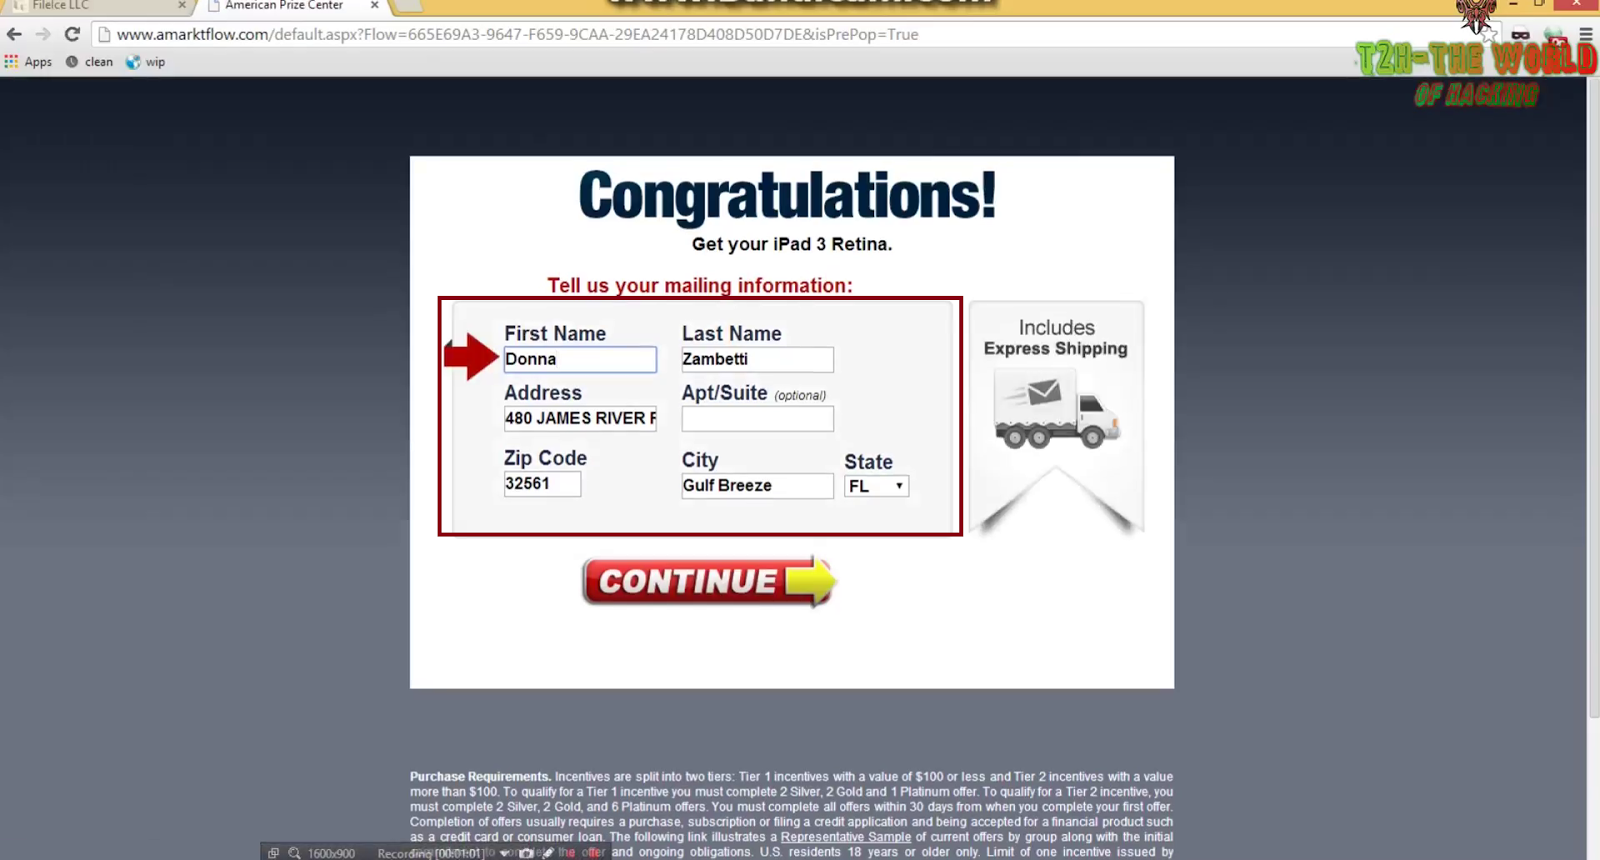
Step 6. Here fill fake info ex: Fake Name, Fake Email etc. 
how_to_bypass_fileice_sharecash_cleanfiles_survey_in_a_minute


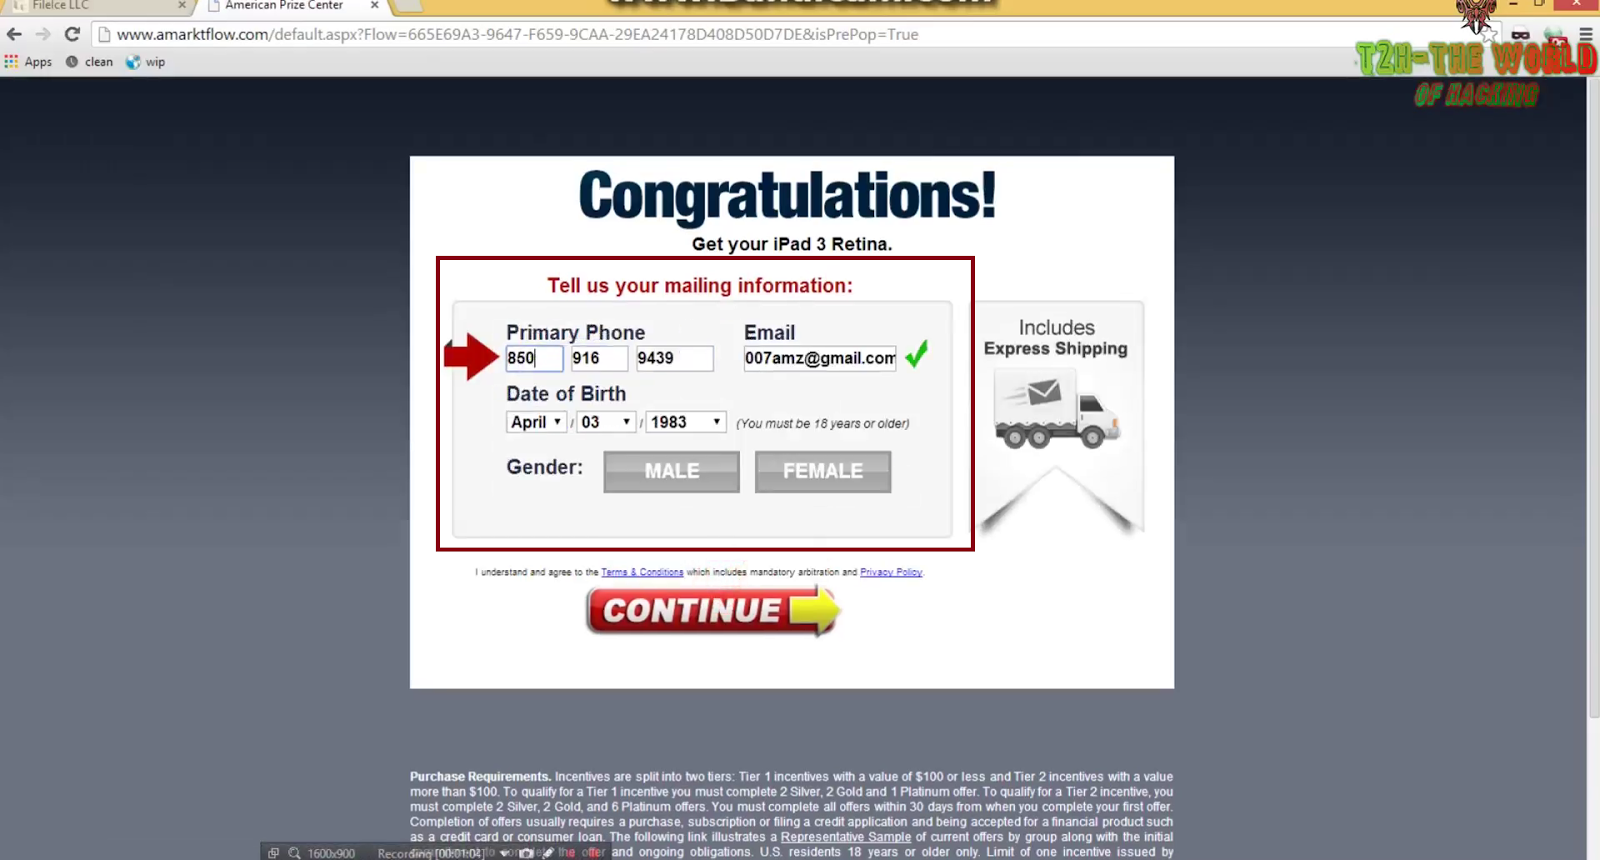
Step 7. Click Continue and then fill fake mobile no. , Age etc.
bypass_fileice_survey_easily_full_guide

Step 8. Now click on Continue. And that's it now your file will start downloading. 
fileice_survey_unlock_in_a_minute


How To Bypass Filecie Survey In A Minute Full Video Working


Note:- If the file not unlocks after 1st attempt then choose another survey and do the same. You will surely get your file unlocked. :) 


Download Unlimited UDP VPN 


If you have any query or questions regarding this post then don't hesitate to ask in comments. We are always happy to help others. 


If you liked this post then please share this post with your friends on Facebook and other social sites because 'Sharing is Caring' :) 


Share+Like+Comments - Thank You! :) 

Friday, January 2, 2015

Create Bootable USB of Windows 7, 8, 8.1 Easy way Full Tutorial

- No comments

How To Create A Bootable USB Of Windows 7, 8 and 8.1

Create Bootable USB Of Any OS Like Windows 7, Windows 8,8.1 Pro, Linux RHEL, Kali Linux,Backtrack
Nowadays everyone uses computer and they need to install operating system in order to use computer. So the problem is how to make a bootable USB to install operating system, we can also install by using DVD or CD but that is slow and old way. So in this post i'll guide you how to create bootable USB of Windows Operating System to install Operating system faster and easily. 
So Follow the steps carefully to boot windows from USB.

What You Need To Create A bootable USB


Rufus is a utility that help format and create bootable USB flash drives,Such as USB Keys/Pendrives,Memory Sticks,Etc.


It can be especially useful for cases where:
  •         You need to create USB installation media from bootable ISOs (Windows, Linux, UEFI, etc.)        
  •         You need to work on a system that doesn't have an OS installed
  •         You need to flash a BIOS or other firmware from DOS
  •         You want to run a low-level utility
        
Download Ufus From Below Link 


Download Rufus 


MS Windows All Run Commands Latest Tutorial

- No comments
 Windows All Run Commands

In this post you'll find all the Run commands for Microsoft Windows. The run command are very useful to direct run any program or settings. These commands will make  you way easy. :)


Start > Run

Accessibility Controls

access.cpl

Add Hardware Wizard

hdwwiz.cpl

Add/Remove Programs

appwiz.cpl

Administrative Tools
control.exe admintools

Automatic Updates

wuaucpl.cpl

Bluetooth Transfer Wizard
fsquirt

Calculator
calc

Certificate Manager

certmgr.msc

Character Map

charmap

Check Disk Utility

chkdsk

Clipboard Viewer

clipbrd

Command Prompt

cmd

Component Services

dcomcnfg

Computer Management

compmgmt.msc

Date and Time Properties

timedate.cpl

DDE Shares

ddeshare

Device Manager

devmgmt.msc

Direct X Control Panel (if installed)

directx.cpl

Direct X Troubleshooter

dxdiag

Disk Cleanup Utility

cleanmgr

Disk Defragment

dfrg.msc

Disk Management

diskmgmt.msc

Disk Partition Manager

diskpart

Display Properties

control.exe desktop

Display Properties

desk.cpl

Display Properties (w/Appearance Tab Preselected)

control.exe color

Dr. Watson System Troubleshooting Utility

drwtsn32

Driver Verifier Utility

verifier

Event Viewer

eventvwr.msc

File Signature Verification Tool

sigverif

Findfast

findfast.cpl

Folders Properties

control.exe folders

Fonts

control.exe fonts

Fonts Folder

fonts

Free Cell Card Game

freecell

Game Controllers

joy.cpl

Group Policy Editor (XP Prof)

gpedit.msc

Hearts Card Game

mshearts

Iexpress Wizard

iexpress

Indexing Service

ciadv.msc

Internet Properties

inetcpl.cpl

Java Control Panel (if installed)

jpicpl32.cpl

Java Control Panel (if installed)

javaws

Keyboard Properties

control.exe keyboard

Local Security Settings

secpol.msc

Local Users and Groups

lusrmgr.msc

Logs You Out Of Windows

logoff

Microsoft Chat

winchat

Minesweeper Game

winmine

Mouse Properties

control.exe mouse

Mouse Properties

main.cpl

Network Connections

control.exe netconnections

Network Connections

ncpa.cpl

Network Setup Wizard

netsetup.cpl

Nview Desktop Manager (if installed)

nvtuicpl.cpl

Object Packager

packager

ODBC Data Source Administrator

odbccp32.cpl

On Screen Keyboard

osk

Opens AC3 Filter (if installed)

ac3filter.cpl

Password Properties

password.cpl

Performance Monitor

perfmon.msc

Performance Monitor

perfmon

Phone and Modem Options

telephon.cpl

Power Configuration

powercfg.cpl

Printers and Faxes


control.exe printers

Printers Folder

printers

Private Character Editor

eudcedit

Quicktime (If Installed)

QuickTime.cpl

Regional Settings

intl.cpl

Registry Editor

regedit

Registry Editor

regedit32

Removable Storage

ntmsmgr.msc

Removable Storage Operator Requests

ntmsoprq.msc

Resultant Set of Policy

rsop.msc

Resultant Set of Policy (XP Prof)

rsop.msc

Scanners and Cameras

sticpl.cpl

Scheduled Tasks

control.exe schedtasks

Security Center

wscui.cpl

Services

services.msc

Shared Folders

fsmgmt.msc

Shuts Down Windows

shutdown

Sounds and Audio

mmsys.cpl

Spider Solitare Card Game
spider

SQL Client Configuration

cliconfg

System Configuration Editor

sysedit

System Configuration Utility

msconfig

System File Checker Utility

sfc

System Properties

sysdm.cpl

Task Manager

taskmgr

Telnet Client

telnet

User Account Management

nusrmgr.cpl

Utility Manager

utilman

Windows Firewall

firewall.cpl

Windows Magnifier

magnify

Windows Management Infrastructure

wmimgmt.msc

Windows System Security Tool

syskey

Windows Update Launches

wupdmgr

Windows XP Tour Wizard

tourstart

Wordpad

write

Thursday, January 1, 2015

All Shortcut Key Of Microsoft Windows XP Latest

- No comments


Windows XP All Shortcut Keys

In this post i am giving all the shortcut keys of Microsoft Windows XP. These shortcut keys are very helpful and time saving. I hope this tutorial will help you. :)

Windows XP Shortcut Keys :-

ALT + - (ALT+hyphen) Displays the Multiple Document Interface (MDI) child window's System menu ALT+ENTER View properties for the selected item


 ALT + ESC Cycle through items in order they were opened
ALT + F4 Close the active program or item
ALT + SPACE Display the System menu for the active window
ALT + TAB Switch between open items
ALT + Underlined Display the corresponding menu
BACKSPACE View the folder one level up in My Computer or Windows Explorer


 CTRL+A Select all
CTRL+B Bold
CTRL+C Copy
CTRL+I Italics
CTRL+O Open an item
CTRL+U Underline
CTRL+V Paste
CTRL+X Cut
CTRL+Z Undo
CTRL+F4 Close the active document
CTRL while dragging Copy selected item
CTRL+SHIFT while dragging Create shortcut to selected iteM
CTRL+RIGHT ARROW Move the insertion point to the beginning of the next word


CTRL+LEFT ARROW Move the insertion point to the beginning of the previous word


CTRL+DOWN ARROW Move the insertion point to the beginning of the next paragraph


 CTRL+UP ARROW Move the insertion point to the beginning of the previous paragraph


 SHIFT+DELETE Delete selected item permanently without placing the item in the Recycle Bin 

ESC Cancel the current task
F1 Displays Help
F2 Rename selected item
F3 Search for a file or folder
F4 Displays the Address bar list in windows explorer
F5 Refresh the active window
F6 Cycle through screen elements in a window or on the desktop
F10 Activate the menu bar in the active program
SHIFT+F10 Display the shortcut menu for the selected item
CTRL+ESC Display the Start menu
SHIFT+CTRL+ESC Launches Task Manager
SHIFT when you insert a CD Prevent the CD from automatically playing


WIN Display or hide the Start menu
WIN+BREAK Display the System Properties dialog box
WIN+D Minimizes all Windows and shows the Desktop
WIN+E Open Windows Explorer
WIN+F Search for a file or folder
WIN+F+CTRL Search for computers
WIN+L Locks the desktop
WIN+M Minimize or restore all windows
WIN+R Open the Run dialog box
WIN+TAB Switch between open items

HIdden Run Commands

Hidden Bluetooth software in windowsXp:

>START
>RUN
>FSQUIRT 

Restoring a Lost Desktop:

>Start
>Run
Type a period " . "
Then press Enter

R You Playing Game In Ur pc?


Want To Do It Advance?


Try This Trick
GoTo - run - type > joy.cpl
DONE!

If ur PC is hanged then do this:

Press shift+ctrl+esc
n den click on 'END TASK'
ur PC is runing now


Create folder without name:

>select any folder
>rename it
>press alt & type 0160
>enter

Amazing trick for use:

Windows Backup Utility if installed


go to run
type ntbackup
ok
Now use backup

Disable CD Autorun

1) Windows Key + R and enter GPEDIT.MSC

2) Go to Computer Configuration, Administrative Templates, System.

3) Find the entry for Turn Autoplay off and modify it as you wish.

Remove the Recycle Bin from the Desktop

If you don't use the Recycle Bin to store deleted files , you can get rid of its desktop icon all together.

Run Regedit and go to:

HKEY_LOCAL_MACHINE/SOFTWARE/Microsoft/Windows/CurrentVersion/explorer/Desktop/NameSpace

Click on the "Recycle Bin" string in the right hand pane. Hit Del, click OK.

Hide 'User Accounts' from users
Go to Start/Run, and type:

GPEDIT.MSC

Open the path

User Config > Admin Templates > Control Panel

Doubleclick "Hide specified Control Panel applets"

put a dot in 'enabled', then click 'Show"

click Add button,

type "nusrmgt.cpl" into the add box

Turn off Welcome screen

Open User Accounts in Control Panel.

Click Change the way users log on or off


Hope you enjoyed! If you like my work please share it.

How To Earn Extra Money With Your Websites Or Blog [Guide] [UPDATED]

- No comments
Extra Earning With Your Websites

Guys if you are running your blog and website by uploading files and want to earn some extra money, now today I will share with you some of the real and genuine sites which are giving the user's money for more than a year and are trusted one. You can search on every format regarding these sites, you will come to at one point as these are real and trusted sites for earning  by uploading sites.
Also there are lot of sites which gives the money but these sites are one of the best while in case of withdraw your money and in other services. The sites with their maximum uploading files rates are listed below with brief explanation and signup methods. If you are running your sites with only 1000 viewers everyday, you can easily make more than 10$ by these sites, and there are no limits for earning


UsersCloud
UserCloud is the best site which I ever saw and gives maximum revenue, as using it you can earn even 10$ in a day and good thing is that it's minimum withdraw is 5$, also other features of that site are :
  • Unlimited Storage
  • Unlimited Downloads
  • Unlimited Upload
  • Unlimited file size
  • Files Never Deleted
  • Remote URL upload
  • Download-Accelerators support
  • Downloads resume
  • Unlimited Download Speed
  • No downloads delay
  • No downloads captcha
  • FTP
  • No Advertisements
Accepted payout method is Paypal yet, but I have talked to admin of that site, and more payout method will be introduced in next years. So hurry up guys and register on this amazing site. Link has been provided above for the site info and registration.
Rapidgator
Rapidgator is one of the best and trust worthy site which gives upto 40$ by uploading files on their site, also it has more than 2000 GB Free storage for your files. For earning from rapidgator, you just need to signup on this site and just upload your files and start your earnings with them today. The signup link is Here !
Withdraw notes : First you cannot get money at once, for this you will have to upload the files and then will get different rates on the basis of sizes of files, but you can earn maximum from them after signup and also it the good and reliable hosting site; by using this site, you can get cheap and better hosting for your site as well. Minimum withdraw is 15 USD. Accepted Payment method is webmoney.
Tusfiles
Tusfiles is also best and trustworthy site for the earning by uploading, you can earn maxium 10 USD after 1000 uploaded files download, also they give the point on the basis of download. Use it and start making money, also they have user friendly and good staff which gives response quickly. To earn with tusfiles, just signup and start uploading the files and earn the maximum with them.
Withdraw notes : It gives the withdraw within 48 hours when you get the minimum amount of 10 USD. Accepted Payment methods are webmoney, payza, paypal, wire transformer, payoneer, perfect money, and amazon gift card.
Hugefiles
Hugefiles is also a trusted and good service which gives money on uploading the different types of files and gives revenue after downloading these files. It gives maximum of 25 USD after downloading of 10000 files. The minimum withdraw amount for this hosting site is 15 USD. To earn signup link is given below
Withdraw notes : Accepted Payout methods are webmoney and paypal.
Freakshare
It’s also a trusted site which gives more than 25 USD on 1000 downloads of your uploading site w.r.t size of your files.
Withdraw notes : The minimum withdraw is 15 USD and accepted payout method is webmoney.
Sendmyway
It’s also a good and newly designed upload hosting site which gives the maximum of 10 USD after 1000 downloads of your files.
Withdraw notes : The minimum withdraw is 10 USD and accepted payout method is paypal.

NOTE
There are lot of sites for this purpose, but these are the genuine sites which are not fraud or any other spamming sites which have given money a lot of user’s. Also you can ask any question regarding the topic. Guys as I have used referral links, so it’s your choice to whether trust me or not.
Related Posts Plugin for WordPress, Blogger...